SEOs and Copywriters are often on opposing ends of the marketing disciplines, but can't they work together? Here's why we believe in SEO Copywriting.
Read More


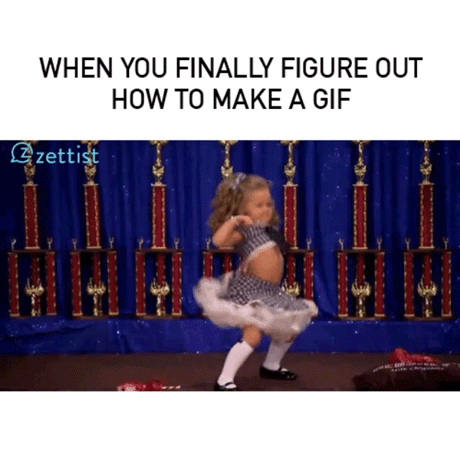
Memes are all the craze right now, but they can be tricky to figure out—especially when the meme includes an animated GIF. Well, if you are wondering how you can make GIF meme like our example below, look no further!
We are going to go through the step-by-step process for you. If you are a visual learner, head to the bottom of this page and check out our YouTube tutorial. Now, we won’t be making the actual GIF, but we will be embedding it into a meme and then uploading it to Twitter and Instagram.
First, head over to Google or Giphy and search for the GIF file that you would like to use. I tend use Google just in case the creator of the animation did not upload the file to Giphy. For this tutorial, we typed “happy dance” into Google and got this adorable result:

Make sure that your GIF fully loads before you download it, or you will end up with a motionless JPEG image.
Next, open Photoshop and grab the GIF that you just downloaded from your file folder.
We always want our memes to be a square so that they look great on all visual platforms. To do this, click on Image > Canvas Size. Your canvas becomes a square when you make the width and height the larger the same size and always the larger of the two numbers. In this case, and in many cases, it is 6.944 in. Once your canvas is “larger number” x “larger number,” you are ready for the next step.

Now that your GIF is in the middle of the square canvas, you may want to move it. You can do this by clicking the top layer of your GIF in the “Layers” panel, holding down shift, and clicking the bottom layer.

Once all of your layers are selected, click the “Move” tool and move the GIF to the spot on the canvas where you want it to be. When you’re satisfied with the position, be sure to click the spacebar to see how it looks. We recommend doing this after each step. This way, if you mess up, you don’t have to start all over again from the beginning! (Don’t you wish there was a “spacebar” for life?)

Once your GIF is in the correct place, it is time to add your text.
You can add the text by clicking the “Type” tool in Photoshop and selecting the font, size, and color you would like to use. Then type in that caption!

Now that your text is on the image and you have checked to make sure the GIF looks correct, you are done! Unless you are looking for some recognition, then read along.
If you want people to know who created this masterpiece, we suggest either putting your logo or Instagram/Twitter handle in the corner of the photo. This will give people who think it’s funny or helpful a reference on who to follow on social media. So, grab that “Type” tool, or drag your logo to the corner and then, you guessed it, check to make sure it looks perfect!.
In our tutorial, our logo was huge when we dragged it onto the canvas. In order to change this, make sure the logo layer is selected and then hit Command + T or Control + T (depending on whether you have a Mac or PC). Now hold down Shift to make the image smaller or larger. By holding down Shift, you are letting Photoshop know that you want to scale it down with its proper proportions.

The final step to creating this animated masterpiece is to go to File > Export > Save for Web (Legacy). If you don’t want the transparent background, uncheck the box that says “Transparent” and make sure all of your settings look like these:

This GIF will now work on Twitter, but for Instagram and Facebook you need to take it a step further. Go to Giphy and upload your GIF to their platform. Make sure to fill out the tags and source URL (your website). Then, when the GIF uploads, click the Instagram or Facebook icon and Giphy will email you the file. Or, you can go to File, Export, Render Video in Photoshop and you will get the same result (Just make sure the file size will fit on social media)!
Voilá! You are now a GIF god! Now get out there and make people laugh with your creativity.
Have any questions or improvements to our tutorial? Comment below! We always love feedback.
posted in: Social Media Marketingsocial media marketing


SEOs and Copywriters are often on opposing ends of the marketing disciplines, but can't they work together? Here's why we believe in SEO Copywriting.
Read More


SEO content writing does it all—find out how we serve readers and search engines via this in-depth method.
Read More

The Pi AI Chatbot is an inflection AI that can have real-time conversations with you. Listen to its insight on the future of marketing here.
Read More

Chat GPT is trending across the web, so we wanted to let Chat GPT weigh in on the question, "What the heck is it and how does it work?" Here's what it said.
Read More
